Master the Art of Pickling: A Step-by-Step Guide to Preserving Foods
- Benefits of Pickling
- Essential Tools and Ingredients
- Step-by-Step Guide to Pickling
- 1. Preparation of the Food
- 2. Preparing the Brine
- 3. Sterilizing the Jars
- 4. Packing the Jars
- 5. Pouring the Brine
- 6. Sealing and Storing the Jars
- Tips and Tricks for Successful Pickling
- Popular Pickling Recipes
- 1. Classic Dill Pickles
- 2. Spicy Pickled Jalapenos
- 3. Sweet and Tangy Bread and Butter Pickles
Pickling is a centuries-old technique of preserving food that not only extends its shelf life but also enhances its flavor and texture. This age-old method involves immersing fruits, vegetables, or even meats in a brine solution or vinegar mixture. The process of pickling creates a tangy and acidic environment that inhibits the growth of bacteria, making the food safe to consume for an extended period.
Throughout history, pickling has been used as a way to preserve seasonal produce and ensure a steady supply of food during lean times. It was particularly popular before refrigeration became widely available. Today, pickling has evolved into a culinary art form that adds depth and complexity to dishes.
In addition to its practical benefits, pickling offers a myriad of flavors and textures. From crunchy dill pickles to spicy jalapenos and sweet bread and butter pickles, there is something for every palate. Whether you're looking to add some zing to your sandwiches or create unique condiments for your charcuterie board, mastering the art of pickling will elevate your culinary repertoire.
In this comprehensive guide, we will explore the benefits of pickling, essential tools and ingredients needed for successful pickling, step-by-step instructions on how to pickle effectively, tips and tricks for achieving great results, as well as popular recipes to get you started on your pickling journey. So let's dive in and discover the world of pickling!
Benefits of Pickling
Pickling is not only a delicious way to preserve food, but it also offers numerous health benefits. Here are some of the key advantages of pickling:
1. Increased Nutritional Value: Pickled vegetables retain most of their vitamins and minerals, making them a nutritious addition to your diet. The pickling process helps to preserve important nutrients such as vitamin C, fiber, and antioxidants.
2. Probiotic Powerhouse: Fermented pickles contain beneficial bacteria known as probiotics. These live microorganisms promote a healthy gut by aiding digestion, boosting the immune system, and improving overall gut health.
3. Extended Shelf Life: By pickling fruits and vegetables, you can extend their shelf life significantly. This allows you to enjoy seasonal produce all year round while reducing food waste.
4. Flavor Enhancement: Pickling enhances the flavor profile of foods by adding tanginess, sweetness, or spiciness depending on the recipe. It can transform ordinary ingredients into extraordinary culinary delights.
5. Versatility in Culinary Creations: Pickled foods can be used in various dishes to add a burst of flavor and texture. They can be enjoyed as condiments, toppings for sandwiches or burgers, added to salads or grain bowls, or even incorporated into cocktails.
6. Convenient and Ready-to-Use: Once pickled, foods are conveniently ready-to-use whenever needed. They make for quick snacks or additions to meals without the need for extensive preparation.
Incorporating pickled foods into your diet not only adds excitement to your meals but also provides essential nutrients and promotes good digestive health. So why not explore the world of pickling and elevate your food experience today?
Essential Tools and Ingredients
To master the art of pickling, it is important to have the right tools and ingredients on hand. Here are some essential items you will need:
1. Glass Jars: Use glass jars with airtight lids for pickling. Mason jars or canning jars work well as they are designed to withstand high temperatures.
2. Brine: The brine is a mixture of water, vinegar, and salt that acts as a preserving agent. Use distilled white vinegar or apple cider vinegar for best results.
3. Salt: Pickling salt or kosher salt is recommended as it does not contain any additives that could affect the flavor or appearance of the pickles.
4. Spices and Herbs: Depending on your preference, you can add various spices and herbs to enhance the flavor of your pickles. Common options include dill seeds, mustard seeds, garlic cloves, peppercorns, and bay leaves.
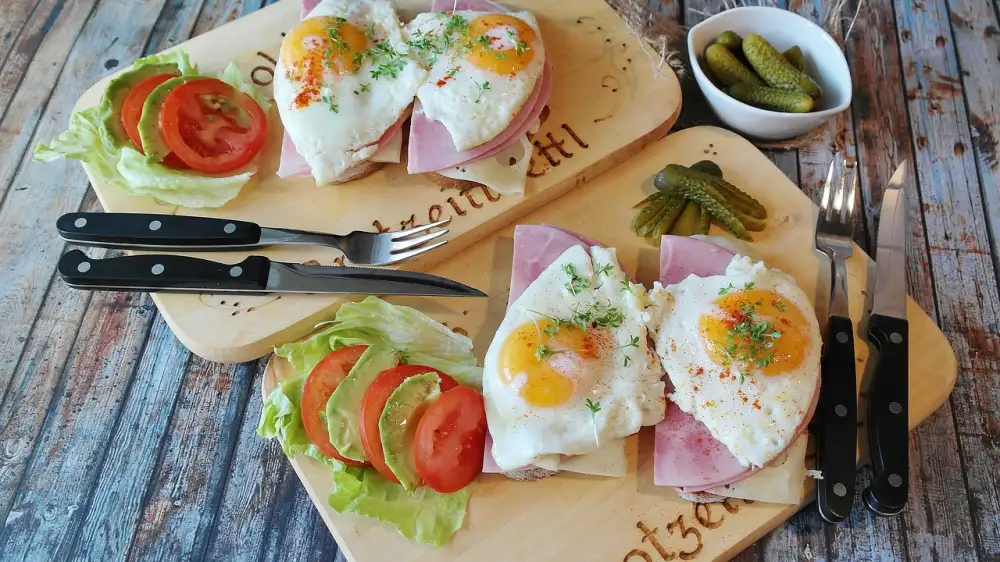
5. Fresh Produce: Choose fresh and firm vegetables or fruits for pickling. Popular options include cucumbers, jalapenos, carrots, onions, beets, cauliflower, and green beans.
6. Cutting Board and Knife: A sturdy cutting board and sharp knife are essential for preparing the produce before pickling.
7. Mixing Bowl: A large mixing bowl will come in handy when preparing the brine mixture.
8. Saucepan: You will need a saucepan to heat the brine ingredients before pouring it over the vegetables or fruits.
9. Tongs or Jar Lifter: These tools will help you handle hot jars safely during the pickling process.
10. Canning Pot (Optional): If you plan on long-term storage of your pickles at room temperature, a canning pot with a rack is useful for processing sealed jars in boiling water.
Having these essential tools and ingredients ready will ensure that you are well-equipped to embark on your pickling journey.
Step-by-Step Guide to Pickling
1. Preparation of the Food: Start by selecting fresh, firm vegetables or fruits for pickling. Wash and cut them into desired shapes, removing any bruised or damaged parts.
2. Preparing the Brine: In a saucepan, combine equal parts water and vinegar along with salt and sugar to taste. Bring the mixture to a boil until the salt and sugar dissolve completely.
3. Sterilizing the Jars: Thoroughly clean glass jars and lids with hot soapy water. Rinse well and place them in a large pot filled with boiling water for about 10 minutes to sterilize.
4. Packing the Jars: Pack the prepared vegetables or fruits tightly into the sterilized jars, leaving some headspace at the top.
5. Pouring the Brine: Carefully pour the hot brine over the packed jars, ensuring that all vegetables or fruits are fully submerged. Leave about ½ inch of headspace.
6. Sealing and Storing the Jars: Wipe off any spills on the jar rims, place lids on top, and screw them tightly. Allow the jars to cool completely before storing them in a cool, dark place for at least two weeks to develop flavors.
Remember to label each jar with its contents and date of preparation for easy identification later on.
1. Preparation of the Food
Before diving into the art of pickling, it is crucial to prepare the food properly. Start by selecting fresh and firm vegetables or fruits that are at their peak ripeness. This ensures optimal flavor and texture in your pickles.
Next, thoroughly wash the produce to remove any dirt or impurities. For vegetables like cucumbers, be sure to scrub them gently with a brush to get rid of any waxy residue. Trim off any bruised or damaged parts as they can affect the quality of your pickles.
To enhance the flavors and allow the brine to penetrate evenly, it is recommended to slice or chop the vegetables into uniform sizes. This also helps in achieving consistent texture throughout your pickles.
For fruits, remove any pits, seeds, or tough skins before proceeding with the pickling process. It's important to note that some fruits may require blanching or precooking before pickling to ensure they retain their shape and texture.
By taking these steps to properly prepare your food, you set yourself up for successful and delicious pickling results.
2. Preparing the Brine
Preparing the brine is a crucial step in the pickling process. The brine acts as a preserving agent and imparts flavor to the food being pickled. To make the brine, you will need water, vinegar, salt, and sugar. The ratio of these ingredients can vary depending on personal preference and the type of pickle you are making. Generally, a common ratio is 1 part vinegar to 1 part water, with about 1 tablespoon of salt and sugar per cup of liquid. Combine all the ingredients in a saucepan and bring it to a boil, stirring until the salt and sugar dissolve completely. Once boiled, remove from heat and let it cool before using it to pickle your chosen vegetables or fruits.
3. Sterilizing the Jars
Sterilizing the jars is a crucial step in pickling to ensure the preservation of your food. To sterilize the jars, start by washing them thoroughly with hot soapy water and rinsing them well. Then, place the jars in a large pot and fill it with enough water to cover the jars completely.
Bring the water to a boil and let it simmer for about 10 minutes. This will kill any bacteria or microorganisms that may be present on the jars. Using jar tongs, carefully remove the jars from the boiling water and place them upside down on a clean towel to dry.
It's important to note that you should never touch the inside of the jars or lids after they have been sterilized, as this can introduce contaminants. Instead, use clean tongs or wear gloves when handling them.
Properly sterilized jars will help prevent spoilage and ensure that your pickled foods stay fresh for longer periods of time. So take the time to sterilize your jars before packing them with your delicious pickles or other preserved treats.
4. Packing the Jars
After preparing the food and sterilizing the jars, it's time to pack them with your desired ingredients. Make sure to tightly pack the jars with the vegetables or fruits, leaving some headspace at the top. This will allow for expansion during fermentation. You can layer different ingredients for added flavor and variety. Be creative and experiment with different combinations of spices, herbs, and vegetables. The key is to ensure that everything is evenly distributed in the jar for a consistent pickling process.
5. Pouring the Brine
Once you have packed your jars with the prepared vegetables or fruits, it's time to pour in the brine. The brine is a mixture of vinegar, water, salt, and spices that will give your pickles their distinct flavor.
To ensure even distribution of the brine, use a ladle or a funnel to carefully pour it into each jar. Make sure to leave about ½ inch of headspace at the top to allow for expansion during fermentation.
Slowly pour the brine over the vegetables, ensuring that they are completely submerged. This will help preserve their freshness and prevent spoilage. If needed, use a clean spoon or chopstick to remove any air bubbles trapped between the vegetables.
Remember to wipe the rims of the jars clean before sealing them tightly with sterilized lids and bands. Proper sealing is crucial for creating an airtight environment necessary for pickling.
Once sealed, label each jar with its contents and date of preparation. Store them in a cool, dark place such as a pantry or cellar for optimal flavor development.
Now that you've successfully poured the brine and sealed your jars, all that's left is to patiently wait for the magic of pickling to happen!
6. Sealing and Storing the Jars
Once you have packed the jars with your pickled food and poured in the brine, it's time to seal them properly. This step is crucial for preserving the flavors and ensuring the safety of your pickles.
To seal the jars, place a sterilized lid on top of each jar and screw on a band until it is fingertip tight. Make sure not to overtighten as this can prevent air from escaping during the fermentation process.
After sealing, it's important to store the jars in a cool, dark place. The ideal temperature for pickling is between 50-70°F (10-21°C). Avoid exposing them to direct sunlight or extreme heat, as this can lead to spoilage.
Allow the pickles to ferment at room temperature for about 24 hours before transferring them to cold storage. This will help develop their flavor and ensure they are properly preserved.
Once fermented, move the jars to a refrigerator or cellar with a temperature range of 32-40°F (0-4°C). Pickles can be stored for several months in these conditions, but it's best to consume them within 1 year for optimal taste and texture.
Remember, always label your jars with the date of preparation for easy tracking. Enjoy your homemade pickles as a delightful addition to sandwiches, salads, or charcuterie boards!
Tips and Tricks for Successful Pickling
1. Choose the right produce: Opt for fresh, firm fruits and vegetables that are at their peak ripeness. Avoid overripe or bruised produce as they may affect the quality of the pickles.
2. Use high-quality vinegar: Vinegar is a crucial ingredient in pickling, so it's important to choose a vinegar with at least 5% acidity. White distilled vinegar and apple cider vinegar are commonly used options.
3. Don't forget the salt: Salt not only adds flavor but also helps preserve the pickles. Use non-iodized salt, such as kosher or pickling salt, as iodine can cause discoloration.
4. Experiment with spices and herbs: Enhance the flavor profile of your pickles by adding spices like dill seeds, mustard seeds, coriander seeds, or herbs like bay leaves and garlic cloves. Be creative and try different combinations!
5. Properly sterilize jars: Before packing your pickles, ensure that your jars are thoroughly cleaned and sterilized to prevent any bacterial contamination.
6. Patience is key: Allow your pickles to ferment for the recommended time stated in the recipe. Rushing this process may result in underdeveloped flavors or spoilage.
7. Store pickles properly: After sealing the jars, store them in a cool, dark place away from direct sunlight. This will help maintain their quality and extend their shelf life.
8. Give it time to mature: While some pickles can be enjoyed immediately after preparation, many benefit from aging for a few weeks to develop complex flavors.
Remember, practice makes perfect when it comes to pickling! Don't be afraid to experiment with different ingredients and techniques to find your favorite combinations. Happy pickling!
Popular Pickling Recipes
6. Popular Pickling Recipes
Pickling is a versatile technique that can be used to preserve a wide variety of foods. Here are three popular pickling recipes that you can try at home:
6.1. Classic Dill Pickles:
Ingredients:
- 4 cups cucumbers, sliced
- 2 cups water
- 1 cup white vinegar
- 2 tablespoons pickling salt
- 4 cloves garlic, peeled and crushed
- 2 sprigs fresh dill
Instructions:
1. In a saucepan, combine water, vinegar, and pickling salt. Bring to a boil.
2. Meanwhile, pack the cucumber slices into sterilized jars.
3. Add crushed garlic and fresh dill to each jar.
4. Pour the hot brine over the cucumbers, leaving about half an inch of headspace.
5. Seal the jars tightly and store in a cool, dark place for at least two weeks before enjoying.
6.2 Spicy Pickled Jalapenos:
Ingredients:
- 1 pound jalapeno peppers, sliced
- 1 cup white vinegar
- 1 cup water
- 2 tablespoons sugar
- 2 tablespoons pickling salt
- 4 cloves garlic, peeled
Instructions:
1. In a saucepan, combine vinegar, water, sugar, and pickling salt. Bring to a boil.
2. Pack the jalapeno slices and garlic cloves into sterilized jars.
3. Pour the hot brine over the jalapenos, leaving about half an inch of headspace.
4. Seal the jars tightly and let them cool to room temperature before refrigerating.
5. Allow the flavors to develop for at least one week before using.
6.3 Sweet and Tangy Bread and Butter Pickles:
Ingredients:
- 4 cups cucumbers, thinly sliced
- 1 onion, thinly sliced
- 1 cup white vinegar
- 1 cup apple cider vinegar
- 1 cup sugar
- 1 tablespoon pickling salt
- 1 teaspoon mustard seeds
- 1/2 teaspoon turmeric
Instructions:
1. In a saucepan, combine white vinegar, apple cider vinegar, sugar, pickling salt, mustard seeds, and turmeric. Bring to a boil.
2. Add cucumber and onion slices to the boiling mixture. Cook for about 5 minutes.
3. Pack the cooked cucumbers and onions into sterilized jars.
4. Pour the hot brine over the cucumbers, leaving about half an inch of headspace.
5. Seal the jars tightly and let them cool to room temperature before refrigerating.
6. Allow the flavors to meld for at least one week before serving.
Try these delicious pickling recipes to add a burst of flavor to your meals or create unique homemade gifts for friends and family. The possibilities are endless when it comes to pickling!
1. Classic Dill Pickles
Classic Dill Pickles are a beloved staple in the world of pickling. These tangy and crunchy cucumbers are infused with the flavors of dill, garlic, and spices. To make them, start by washing and slicing fresh cucumbers into spears or slices. In a saucepan, combine water, vinegar, salt, sugar, dill seeds, garlic cloves, and black peppercorns to create the brine. Bring the brine to a boil and let it cool slightly. Next, pack the cucumber slices into sterilized jars along with fresh dill sprigs. Pour the brine over the cucumbers until they are fully submerged. Seal the jars tightly and store them in a cool dark place for at least two weeks to allow the flavors to develop. Classic Dill Pickles can be enjoyed as a snack on their own or added to sandwiches and salads for an extra burst of flavor.
2. Spicy Pickled Jalapenos
Spicy pickled jalapenos are a popular choice for those who enjoy a fiery kick in their meals. Not only do they add heat to dishes, but they also bring a unique flavor profile to the table. Jalapenos are rich in vitamins A and C, as well as capsaicin, which has been shown to have anti-inflammatory properties. To make spicy pickled jalapenos, follow the step-by-step guide mentioned earlier, using fresh jalapeno peppers and adding spices like garlic, peppercorns, and red pepper flakes to the brine. The result will be a jar of zesty jalapenos that can be used in various recipes or enjoyed on their own.
3. Sweet and Tangy Bread and Butter Pickles
6.3. Sweet and Tangy Bread and Butter Pickles
One of the most beloved pickles, sweet and tangy bread and butter pickles are a delightful addition to any sandwich or burger. These pickles are made with cucumbers, onions, vinegar, sugar, and a blend of spices.
To make these pickles, start by slicing the cucumbers and onions into thin rounds. In a large bowl, combine the sliced cucumbers and onions with salt and let them sit for about an hour to draw out excess moisture.
Meanwhile, in a saucepan, heat vinegar, sugar, mustard seeds, celery seeds, turmeric, and cloves until the sugar dissolves. Once the mixture comes to a boil, remove it from heat.
After an hour of resting time for the cucumbers and onions, rinse them thoroughly under cold water to remove any excess salt. Then pack them tightly into sterilized jars.
Next, pour the hot vinegar mixture over the packed cucumbers and onions in the jars. Ensure that all the vegetables are fully submerged in the brine. Seal the jars tightly with lids.
Allow the jars to cool completely before storing them in a cool dark place for at least two weeks to allow flavors to develop. The longer they sit, the more flavorful they become.
These sweet and tangy bread and butter pickles can be enjoyed on their own as a snack or used as a condiment in sandwiches or salads. Their crunchy texture combined with their sweet yet tangy flavor is sure to elevate any dish.
Experimenting with different spices like cinnamon or adding chili flakes can give these pickles a unique twist according to personal preference. So why not try making your own batch of these delicious bread and butter pickles today?
In conclusion, pickling is a versatile and rewarding technique that allows you to preserve and enhance the flavors of various foods. Not only does it extend their shelf life, but it also adds a tangy and unique taste to your dishes. By following the step-by-step guide and using the essential tools and ingredients, you can easily master the art of pickling. Experiment with different recipes and flavors to create your own signature pickles. So why not elevate your food experience today by trying your hand at pickling? Happy pickling!
Published: 01. 03. 2024
Category: Food